Showing posts with label Artiste. Show all posts

Sunday, March 6, 2016

Color Dare 183 - Penelope Coffee Card


For this week's color dare challenge, I made a coffee cup birthday card for my Aunt.  She just loves bright colors so I thought of her right away when these colors were posted.  I've been making quite a few different coffee related cards lately and have been enjoying seeing the results. Here's what I came up with this time around.


Here are the instructions for making this card:

  • Artistry cartridge - page 5, cut the coffee cup at 5.5" with White Daisy cardstock.  Trace this onto another piece of White Daisy paper but leave the top a little longer so you can score and fold it to make a hinge after  you cut it out.  Go ahead and attach the two pieces so you have a nice folding card. Then trace the lid on another piece of White Daisy and cut out but don't attach it just yet!  (Note: I'm sure this can be done in the Cricut Design studio; I really have to branch out soon and learn how to use that!) 
  • Cut a piece of Penelope dotted paper to mount on the front of the card; I cut mine at 3.25" x 3.5" then trimmed it to fit after I put it on the card front.
  • Next, cut a piece of Thistle paper at 1.5"x 3.5" and emboss with the Quatrefoil embossing folder 
  • Adhere a .5" x 3.5" strip of the Penelope B&T Duo paper behind the top and bottom of the Thistle paper. Mount this on the front of the card and trim to size.
  • Center a strip of the strip from the Penelope B&T Duo paper on top of the embossed Thistle paper.
  • Cut a tag at 1.25" from page 36 of the Artiste Cricut Cartridge, ink Happy Birthday with Honey from the Holiday Tags stamp set
  • Include a sentiment inside; I used one from the January Stamp of the Month - Beloved Bouquet

Here is another view of the card:


Here are other coffee related cards I made recently, click the pictures if you'd like to see the instructions for these:
Thanks a Latte square card
Gift card holder


Thanks for stopping by to check out this week's color dare challenge.  If you don't already have a Close to My Heart Consultant and want to check out our great products, please stop by my website to see what we have to offer.

Sunday, February 28, 2016

Stampers with Attitude Blog Hop

This is part of the Stampers with Attitude blog hop featuring either the Penelope paper pack or boxes; and in some cases, creative people have worked both items into a single project. If you are coming from Barbi's blog, you are in the right place.


For this project, I broke out my Penelope paper packet and used the pattern from the Wishes book on page 114 as inspiration.  I liked how the title was hanging off the edge of the stamped image.

I started by cutting out the overlay at 2.25" from the Artbooking Cricut Cartridge image on page 62 using the Penelope B&T duo paper and mounted that on top of another piece of this same paper but with the green side up. For the birthday layer, I started with a base of Thistle paper cut at 1 1/2" x 4 1/2" then layered it in White Daisy cut at 1 3/8" x 4 3/8" with the third layer of Penelope purple pattern paper cut at 1 1/4" x 4 1/4" and Birthday title cut at 1 3/4" out of White Daisy using the Artiste Cricut Cartridge image from page 70. Oh, and I used a purple gem for the dot of the "i" before I moved on to the rest of the title.

For the balloon part of the title, stamp the balloon from the Artiste Cricut set in Pixie Ink; with Thistle ink, stamp "Happy" from B1419 - Joyful Birthday stamp set.  Finish off the balloon string with Pixie twine and you have a nice card all ready to give to someone.

Next up in the blog hop is Aggie, let's see what she has to share with us.

Sunday, February 14, 2016

Masculine card - Color Dare 180

Color Dare 180

Heart 2 Heart Challenge
 This week I am participating in Color Dare challenge that is being run in partnership with the Heart 2 Heart challenge at the same time; double duty! This week's challenge is to combine Black, White Daisy and any 1, 2 or 3 of the following reds: Pomegranate, Ruby and Cranberry. I saw several fun designs to get us started and decided to take a non-traditional approach to this one.

I used the shirt card setting cut at 4.5"from the Artiste Cricut cartridge to make this fun card.  I wanted a bit of texture for the shirt and the embossing folders I had on hand were a bit too much for what I had in mind so I got out my score board and did my own embossing to make the checked pattern (you might need to zoom in to see that detail.)  For the tie, I used Ruby ink on a pattern stamp then layered in some strips of black shimmer trim that I cut half.  You can make a matching envelope from this cartridge as well or slip it in one of the square White Daisy envelopes if you happen to have those on hand.


I was having so much fun with this one that I made a second card we'll make for my next gathering. (That way, I can have the pieces all cut and ready to go for assembly without waiting for everyone to pass around the only score board I have!)

For this card, I used the same shirt card pattern but then picked Cranberry as the accent color. For the argyle pattern, I had to adjust the size of the cut to 3.5" so it would fit on the front of the shirt; then inked the dashed lines with White Daisy and did a bit of trimming to make it fit.


You can find the Artiste Cricut collection and a lot more great Close to My Heart products on my website if you don't already have a consultant.

Wednesday, February 3, 2016

Birthday Card Cupcake

 Color My Heart Color Dare

I am participating in the Color Dare challenge #178 this week to create a project using just the colors shown above.  This nice birthday card was the end result and it was pretty quick and easy to make too!


Here's the inside with my sentiment inked in Thistle:


Instructions:

Using the Artiste Cricut cartridge; cut White Daisy cardstock using the cupcake image found on page 70 at 5" then I cut a piece of Thistle paper a bit wider and taller than the cupcake liner part of the card and used the striped embossing folder to give it some texture.  Adhered it to the card and trimmed the Thistle paper to match the cupcake liner card front.  

Next, I used the scallop embossing folder on the frosting part of the cupcake, inked the embossed part with White Daisy and used clear embossing powder on top for some shine.  (I figured that was still staying true to using just the colors in the challenge.)  

Next, cut the cherry from White Daisy paper; I set the real dial size to .75" on my Cricut; image is on page 70, then I used a sponge dauber to ink the cherry with Pixie ink.  Cut the banner on page 58 at 1" and ink with Glacier using stamp set from Artiste bundle.  Finish the card with the sentiment inside using Thistle ink.

That's it, I hope you like it! Feel free to browse my website to check out all the fun products available from Close To My Heart.


Saturday, January 30, 2016

Blog Hop - Charlotte and Easter

Welcome to the Stampers with an Attitude blog hop. This is my first time I am participating in this particular blog, I needed to give myself more specific reasons to keep up my blog this year so I'm trying to participate in more blog hops and like the different themes to keep me challenged with trying out new techniques and different styles. If you came from Melissa Robinson's blog, you are in the right place!

I've seen a few different coffee cup card gift holders showing up on Pinterest and was inspired to try one out after I got my Cricut Aristry cartridge and noticed there is a coffee cup ready and waiting to print.  For this blog hop, we are showcasing either Easter themed items or the new Charlotte paper pack.  I'm sure you'll find some creative types who managed to work both themes into a single item; I decided to stick with the Charlotte paper for this project.  Let's start with the final product and then I'll walk you through the set-up.


I think it turned out pretty cute and even better, it is a gift card holder as well.  This is the inside (please disregard the extra line under the sentiment, I ran out of time to fix it before posting, it's been a crazy week.)


Here are the steps for making this card, it's a bit more complicated than my normal cards so I made myself some templates for the hand cut pieces and I'm sure it will go much quicker next time I decide to use this type of card.

Prep all your card base pieces using White Daisy cardstock:

  • Artistry cartridge - page 5, cut the coffee cup at 5.5"
  • Then make your card base by tracing the outline of the coffee cup on a separate piece of folded cardstock (you want a fold so you can hide the gift card inside) leave a little extra room at the top, your finished piece will be 9" by 3.25" at it's widest.  Score at 1 5/8" and 6 1/8"
  • Then trace the coffee cup lid using White Daisy (ink it all up with a Versamark pad and heat emboss with white powder to give it a nice finish, I promise, it really looks like an actual lid!)
  • Last step is to cut another piece of White Daisy at 2" x 5" and score it at 1/2" and 4"
At this point, you'll end up with pieces that look like this:


For assembly and finishing:
  • Attach the lid to the card front. 
  • Then use double sided tape to center and adhere the 1/2" flap of the insert piece onto the front flap of the card base, aligning the edges. 
  • Next use Liquid Glass along the very outside edges of the card base fold up the bottom of the card, make sure you the leave the insert free to slide up and down 
  • Attach the card base to the card front
  • Cut a piece of Charlotte paper at 1 1/2"x 2 3/4", mount on the bottom of the card (you will have some overlap)
  • Cut  a piece of Desert Sand paper at 2" x 4" and emboss with the diamond embossing folder
  • Adhere a 4" strip of the Charlotte B&T Duo paper to each side of the Desert Sand paper
  • Attach the Desert Sand piece along the top of the Charlotte paper, trim the edges
  • Cut a tag at 1 1/4" from page 36 of the Artiste Cricut Cartridge, ink Happy Birthday with Sorbet
  • Include a sentiment inside; I used one from the January Stamp of the Month - Beloved Bouquet
I also found this tutorial on Splitcoast stampers with more pictures and step by step instructions (I adjusted the measurements a bit so I could use the Artistry cut as my starting point.)

Supplies used:
Charlotte paper pack
Cardstock: White Daisy and Desert Sand
Inks: Versamark and Sorbet
White embossing powder
Diamond embossing folder

Feel free to browse my website for more inspiration from Close To My Heart if you don't already have a consultant.  Otherwise, I will send you off to Vickie O'Dell to see what she has created for us.  

Friday, January 1, 2016

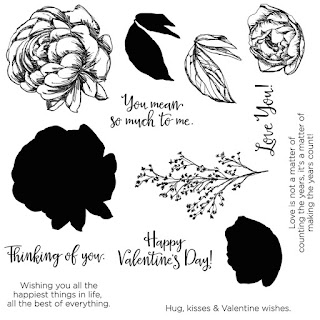
Beloved Bouquet - January SOTM Blog Hop

Welcome to the January 2016 Stamp of the Month Blog Hop. If you have come here from Jean's Blog, you are on the right path! The blog hop is a great big circle, so you can start here and work your way all around.  If you get lost along the way, you’ll find the complete list of participating consultants on Melinda’s Blog.


The Beloved Bouquet stamp set gave me lots of options for inspiration.  I started off with a Valentine's Day card:


 and I used one of the hearts from the negative space on this to go with the sentiment inside the card.


I think my husband will like this card!  Here's the supplies I used:

Artistry Cricut Cartridge - page 28, cut at 5.5" with cranberry cardstock from the Adventure cardstock combo then backed some of the open hearts with silver glitter paper and inked the title. I also embossed the title to give it a bit of shine to complement the glitter and glitz of the card.

Next, I made a birthday card; I just love how you can create a nice dimension with the layered flower stamps.


This one also came together pretty quickly courtesy of the Artiste Cricut Cartridge on this one. Start with a 4.25" x 5.5" piece of Hollyhock cardstock, then layer on a 4" x 5.25" piece of Charlotte paper.  Stamp the flowers on White Daisy cardstock with Pixie as the base and Hollyhock on the outline, for the third flower, I used Pixie as the outline without the base.  Ink the leaves with Sweet Leaf and fussy cut all the elements to put on the card front.  Cut the 1.34" banner from Whisper cardstock and ink the sentiment with Whisper using the stamp set that comes with the Artiste collection.  Voila, two pretty fun cards from one stamp set!

Now "Hop" on over to Pam's Blog to see her work! Be sure to visit all the Consultants at their Blogs to get some great crafting ideas and other fun ideas! The Cheers SOTM is available until November 30. Contact your CTMH Consultant or visit my website.

 S1601 - Beloved Garden

Sunday, October 25, 2015

Scooter birthday card


For today's post, I was inspired by Michelle's blog, a fellow Close to My Heart consultant who made a really nice birthday card using a combination of stamp sets to showcase in the Holiday Expressions blog hop.

I used the same stamp set for the main image and Kaleidoscope papers.  I wanted to have the scooter rims stand out so used some liquid glass to make them nice and shiny, here is a close up view.


If you'd like to try out a similar card, here are the supplies I used:
Ink: Archival black (or regular black), Gypsy, Canary
Embellishments: Clear Sparkles, Liquid Glass, Cherry Pink marker, and some clear glitter glue I happened to have on hand

I also used my Artiste Cricut cartridge to cut out the background image for the birthday sentiment. I love using these cartridges on my projects; it makes the process go so quickly if you are making multiple cards of a similar layout!

Sunday, October 18, 2015

Fall leaves card


I entered this card into the "odd time of year" challenge on Splitcoaststampers which requires an odd number of elements to be used on your project.

Fall is a fun time of year to use the rich colors we see with our trees around here.  This is a quick card to assemble:

  • Use the woodgrain embossing folder on a 4" x 5.25" piece of colonial white cardstock
  • Add some random sparkle colors with Almond Glitz glitter gel
  • Cut out leaves from Autumn Terracotta and Fern cardstock with the Artiste Cricut cartridge
  • Stamp your sentiment with Cocoa ink

Tuesday, October 6, 2015

Spotlight on Holiday Expressions


Welcome to our Spotlight on the Holiday Expressions Blog Hop. If you have come here from Brenda's Blog, you are on the right path! The blog hop is a great big circle, so you can start here and work your way all around.  If you get lost along the way, you’ll find the complete list of participating consultants on Melinda’s Blog.


This month we have 30 Close To My Heart Consultants sharing their creations featuring projects made with paper and stamps in the Holiday Expressions catalog and other great CTMH products on their blogs.  


I wanted to make a project that featured the White Pines paper for fall and thought that this thank you card would be fun.  I cut the card from the Artiste cartridge, inked the title with a sponge dauber and made a belly band so I could insert a gift card inside without it slipping out the side.


Supplies Used:

  • X7200B - White Pines paper pack (colonial white, fern, B&T duo)
  • Z3170 - Artiste Cricut Cartridge
  • S1510 – Twinkle SOTM
  • Z2116 – Cranberry Ink
  • Z2650 – Fern Ink

 Cut the following:

  • 5” thanks card from Artiste Cricut cartridge
  • 1.5" belly band from Fern paper

Assembly instructions:

  • Fold card base in half
  • Use Cranberry ink and sponge dauber on the Thanks title
  • Use Fern ink for and string stamp on front of belly band
  • Cut piece of B&T duo paper to mount on front of card; I cut out a half circle to make it easier to open and add a bit of interest to the front
  • Ink sentiment of your choice inside card

Now "Hop" on over to Lauren's Blog to see her work! Be sure to visit all the Consultants at their Blogs to get some great crafting ideas and other fun ideas! Products from the Holiday Expressions catalog are available through December 30. Contact your CTMH Consultant or visit my website to see more great products offered to help you create fun projects for the upcoming holiday season.

Thursday, October 1, 2015

October Stamp of the Month Twinkle


Welcome to our Stamp of the Month Blog Hop!  We are featuring S1510 - Twinkle SOTM, a set of 15 stamps.  If you have come here from Lori's Blog, you are on the right path! The blog hop is a great big circle, so you can start here and work your way all around.  If you get lost along the way, you’ll find the complete list of participating consultants on Melinda’s Blog.


This month we have 47 Close To My Heart Consultants sharing their creations using this month's SOTM and other great CTMH products on their blogs.  This is simple to do - just click on the link at the end of the post on each blog to move to the next one! Here we go!


This is my first blog hop that I've participated in; it's always fun to try new things.  Speaking of new items, I made this card for a consultant swap event that required us to use a new paper that came out in the most recent catalog along with an assigned stamp set.  I had used the Kaleidoscope paper for a two page birthday layout and was thinking how versatile this paper pack will be for many different themes and projects so thought I'd try it on a Christmas card and am really happy with the results, I hope you agree! 

Supplies Used:
  • 1385 - White Daisy Cardstock
  • X7202B - Kaleidoscope paper
  • Z8997 – White Daisy Envelopes
  • Z3170 - Artiste Cricut Cartridge
  • S1510 – Twinkle SOTM
  • Z3130 – Silver Foil Tape
  • Z2116 – Cranberry Ink
  • Z2197 – Pear Ink
 Cut the following:
·         8.5” x 4.25 white card stock for card base
·         4.25” x 4.25” Kaleidoscope

Artiste Cricut Cartridge and white cardstock:
·         pg 53 accent 1 – cut 1.75”
·         pg 53 accent 2 – cut 2.75”
·         pg 53 accent 3 – cut 2”

Assembly instructions:

  • Fold card base in half
  • Stamp the ornaments with Cranberry ink
  • Place silver foil tape on the Kaleidoscope paper, let it hang over the edge a little as you cut it then fold it over the top of the paper.
  • Mount the Kaleidoscope paper on the front of your card
  • Mount ornaments at ends of silver foil tape
  • Ink sentiment of your choice inside card
  • Ink envelope flap in Pear

Now "Hop" on over to Judy's Blog to see her work! Be sure to visit all the Consultants at their Blogs to get some great crafting ideas and other fun ideas! The Twinkle SOTM is available until October 31. Contact your CTMH Consultant or visit my website to see how you can get this stamp set at a discount!
Twinkle SOTM

Wednesday, July 29, 2015

Gears birthday card


My brother has a birthday this week and this card is sure to be one he likes.  He's always tinkering with something or building things so the gear card is perfect for him.  I used the Artiste Cricut cartridge to cut the white insert and Jackson paper for the outer part of the card.  Then cut gears as a fun accent and used sponge daubers to add a little more texture.  The Holiday Tag set matched nicely for the greeting.

Main supplies used:
Holiday Tags

Jackson Paper Pack

Artiste Cricut Cartridge

Saturday, July 18, 2015

Butterfly Birthday Card

Butterfly Birthday Card
We made this card at a home gathering and it was just in time for my sister-in-law's birthday!  This is a fun and easy card to make.  I was inspired to create a square card when the White Daisy envelopes were placed in the "while supplies last" category at a reduced price of just $6.95 for 50 envelopes.


  • Grab a square 4.5" White Daisy envelope
  • Using the card option on page 46 of the Artiste Cricut Cartridge, cut a 4.5" base with the Glacier cardstock and the bellyband with Blossom paper
  • Cut a piece of White Daisy to 1.75" x 2.5" and Sorbet to 2" x 2.75"
  • Use the broad tip of the ShinHan markers to shade the White Daisy paper piece.  I used pastel peach, pastel green and light orange
  • Your pieces should look like this now:

Pre-assembly items
  • Using the "Your Kind of Wonderful - D1627" set, stamp the butterfly image with black archival ink and the birthday greeting around the edge of the base in Lagoon ink. 


Sunday, May 17, 2015

Mother's Day Card


For Mother's Day, I made some cards with the Hopscotch paper and then cut a variety of flowers with the Artiste Cricut cartridge to go with the Hello Blooms stamp set and then used gold sequins as the flower middles.  This was a fun card to make and could easily be modified for a birthday or hello greeting card.

Main Products used:
Hello Blooms
Artiste Cricut Collection

Sunday, March 15, 2015

Mini Easter cards


Our DeForest Scrappers group started out with a monthly meeting to create 3x3 cards for our local Meals on Wheels program.  This month, we added a new group to. make cards for, the local hospital Neonatal Intensive Care unit.  These families spend a lot of time at the hospital and the staff likes to give out cards to these families and we are glad to be able to help out with this project.  We make about 70 cards for this group so the Cricut "fill sheet" feature comes in very handy for projects like this.

Here is the process:


Steps and supplies used:
Art Philosophy Cricut Cartridge - fill page with 2" egg shapes on page 57 (note, this won't be a perfect size but is really close and you can trim from there - or hide the extra in the grass!)

Artiste Cricut Cartridge - page 73, cut a bunch of grass at .5" with green paper (or just fussy cut your own strips, it doesn't have to be perfect!)

Use the wide part of your choice of Shin Han markers to shade in the eggs (leave them on the mat, it makes it much easier to color all of them more quickly)

Stamp with Archival Black ink using Colored Egg Occasions (retired stamp) but the egg from the Easter Wishes stamp set would work also

Assemble cards by cutting strips of pink paper and then layer a strip of the pink polka dot washi tape (love the washi tape!), add your egg, grass and a sentiment to complete the card.

Archival Black
Easter Wishes
Shin Han Markers

Art Philosophy Cricut Collection


Artiste Cricut Collection
Washi Tape

Sunday, March 8, 2015

Gift card holder


This weekend we made these cute gift card holders for a Close to My Heart party. Everyone loved the simple steps needed to complete this in about 5 minutes.


  1. Cut out card from Artiste cartridge (page 59 at 5.5") with Heartstrings paper
  2. Banner wishes stamp on white with Hollyhock and Crystal Blue ink
  3. Back white title block with Lagoon paper
  4. Use strip of red shimmer trim and mount title block
  5. Inside card, mount white paper and ink sentiment of your choice
Related Posts Plugin for WordPress, Blogger...