Showing posts with label Artbooking. Show all posts

Sunday, February 28, 2016

Stampers with Attitude Blog Hop

This is part of the Stampers with Attitude blog hop featuring either the Penelope paper pack or boxes; and in some cases, creative people have worked both items into a single project. If you are coming from Barbi's blog, you are in the right place.


For this project, I broke out my Penelope paper packet and used the pattern from the Wishes book on page 114 as inspiration.  I liked how the title was hanging off the edge of the stamped image.

I started by cutting out the overlay at 2.25" from the Artbooking Cricut Cartridge image on page 62 using the Penelope B&T duo paper and mounted that on top of another piece of this same paper but with the green side up. For the birthday layer, I started with a base of Thistle paper cut at 1 1/2" x 4 1/2" then layered it in White Daisy cut at 1 3/8" x 4 3/8" with the third layer of Penelope purple pattern paper cut at 1 1/4" x 4 1/4" and Birthday title cut at 1 3/4" out of White Daisy using the Artiste Cricut Cartridge image from page 70. Oh, and I used a purple gem for the dot of the "i" before I moved on to the rest of the title.

For the balloon part of the title, stamp the balloon from the Artiste Cricut set in Pixie Ink; with Thistle ink, stamp "Happy" from B1419 - Joyful Birthday stamp set.  Finish off the balloon string with Pixie twine and you have a nice card all ready to give to someone.

Next up in the blog hop is Aggie, let's see what she has to share with us.

Monday, February 22, 2016

Thinking of You card - Color Dare #181

I am on a roll getting entries into the Color Dare challenge for three weeks in a row now!  This week I went with a more traditional card format for a Thinking of You card I made for a friend of mine going through a tough time.


I started with a card base in Colonial White then used the Artbooking Cricut cartridge to cut out the overlay and backed it with pear paper lined with the fun green shimmer trim at every third opening.  I stamped the flowers from the Pretty Petals Flair set and fussy cut them out (you can also use the Art Philosophy Cricut cartridge to cut them out but since I was just making this one card; I free cut them out) then added some embellishments and stamped the title with Pear ink.  

Here's the supplies I used:
Paper - Colonial White and Pear
Z3169 - Artbooking Cricut Cartridge (cut overlay on page 53 at 4.75" real dial size)
Stamp set - Pretty Petals Flair
Ink - Honey, Pear, Cranberry


Monday, February 15, 2016

CTMH Technique Blog Hop - Kissing Is For Stamping


If you are coming here from Darlys' blog, then you found your way to the CTMH Technique Blog Hop - this month we are showcasing the kissing technique. I had never tried this technique before so I had to do a bit of research and found two different methods so I decided to try them both for this post.

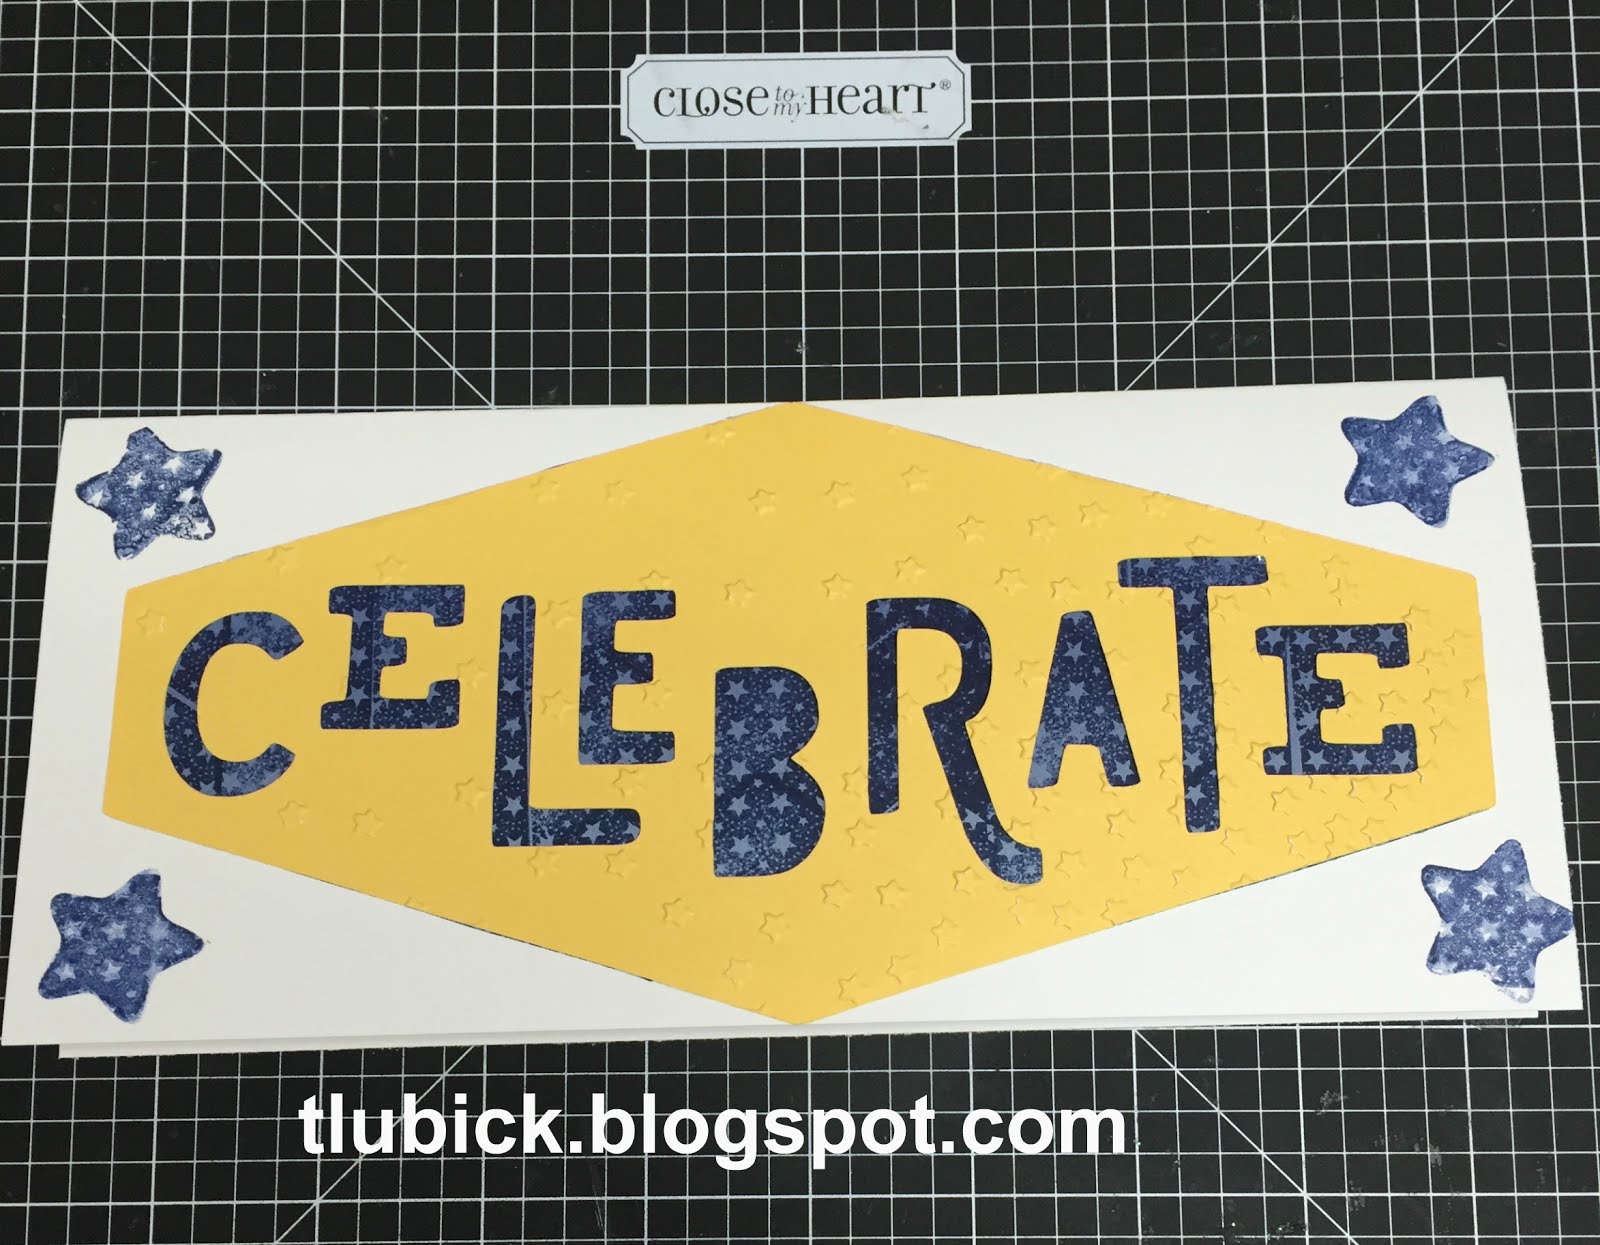
For the first card, I used the stamp to stamp kissing technique which is basically inking a pattern stamp, then using that as your "ink pad" for the plain stamp that you want to use on your creation.  In this picture, you can see that I inked the banner stamp and used the back part of the star stamp to transfer the pattern to the card in a star shape.  Tip to note: clean your transfer stamp each time, otherwise you end up with "muddy" transfer like you see on the right side.....I decided it was fine for this card but if you really want the white to show through, clean the stamp each time.


This is what I ended up with when I was done. I cut the Celebrate title at 4" from the Artistry Cricut cartridge using the pattern from page 19 with Canary paper then ran it through my Cuttlebug with the Confetti Stars embossing folder. The star is from the Casual Expressions stamp set while the pattern background is from a stamp set that came with the Artbooking Cricut cartridge.  I cut the background paper from the Regatta B&T Duo paper then inked it with the pattern background.  Ink color for this is Sapphire; I think this is such a pretty blue!


For the second card, I used the stamp to embossing folder kissing technique which is basically inking an embossing folder, then using that as your "ink pad" for the plain stamp that you want to use on your creation.  In this picture, you can see that I inked the confetti stars embossing folder with Sapphire ink and used the back part of a long banner stamp to transfer the pattern to the card.  Tip to note: clean your transfer stamp each time and don't worry if the pattern looks like it's still on your stamp, it won't transfer if you've cleaned it.  I had used the backside of a stamp and it seems like that part retains more of the color transfer than the front side of the stamp.


Here is the second card. I inked two pieces of Regatta B&T duo paper strips cut at 2" x 5" using the kissing technique.  Next I cut the star border piece at 3.5" real dial size from the Artbooking Cricut cartridge using the pattern from page 65 with Canary paper. The title is from a stamp set that came with the Artbooking Cricut cartridge using Sapphire ink.  I cut two zip strips from the Regatta B&T Duo paper at 5" and layered everything on the card.  Note that the photo border will hang off the edge a bit, a quick trim with the scissors will take care of that.


Thanks for stopping by, if you are ready to move along in the blog hop, Haley is next up, I am sure she has something fun to share with us as well.  If you want to learn more about the techniques or supplies used, keep on scrolling down.

Technique videos:

CTMH Video - Using two stamps
Splitcoast Stampers - Using an embossing folder and a stamp

Supplies used:
Paper: White Daisy, Canary, Regatta paper pack
Ink: Sapphire
Cricut collections: Artistry, Artbooking
Embossing folder: Confetti Stars
Stamp sets:
  D1604 Season of Thanks
  D1525 Casual Expressions

Monday, September 7, 2015

Fallback to Football


This is a "fallback" card made with retired Close to My Heart products that I had laying around.  If you happen to have a piece of the barn red paper left from the fundamentals paper pack, you can make a perfect football for cards or decorations!

Here's what I used for this card:

Artbooking cricut cartridge - cut the football from barn red fundamental paper at 5.5" (back with some white for the laces cut-out section) and the Football title in white from page 82 and then cut grass at 1" real dial size from Olive paper.  Mount on Ivy Lane background paper and  you are all set.


Sunday, February 1, 2015

Mini valentine for Meals on Wheels

I have my supplies lined up for tomorrow night's card making group. The Scrappers of Deforest get together once a month to make 3x3 cards to go out with Meals on Wheels deliveries in the area.  We have a theme each month and a rule that we can only use supplies we already have on hand. The theme this month is Valentine's Day and I had hard time narrowing down to just one option but here's what I ended up with:


Paper: 
Heartstrings paper - 3x3" square and use the arrow strip for trim pieces
Random pink paper - 2" scallop heart (Artiste cartridge)

Ink:
Z2128 - Hollyhock ink

Stamp set:
Z1906 - Artbooking heart stamp 
M1052 - Mini Valentine for sentiment


Wednesday, January 14, 2015

I am getting ready for a crop this weekend and put together a make and take project.  The inspiration comes from this Mojo Monday sketch and the Close To My Heart January Stamp of the Month set.


For this card, I used the following supplies:

S1501 This Moment, January Stamp of the Month
Artbooking Cricut Cartridge for the bullseye
Papers: Heartstrings, Lagoon, White Daisy and Ruby

I used the Heart Embossing Folder and sanded the hearts to get the nice white contrast.  The heart Washi tape works nicely with this card when layered on white paper.


Related Posts Plugin for WordPress, Blogger...