Showing posts with label Embossing Folder. Show all posts
Monday, February 15, 2016
CTMH Technique Blog Hop - Kissing Is For Stamping
If you are coming here from Darlys' blog, then you found your way to the CTMH Technique Blog Hop - this month we are showcasing the kissing technique. I had never tried this technique before so I had to do a bit of research and found two different methods so I decided to try them both for this post.
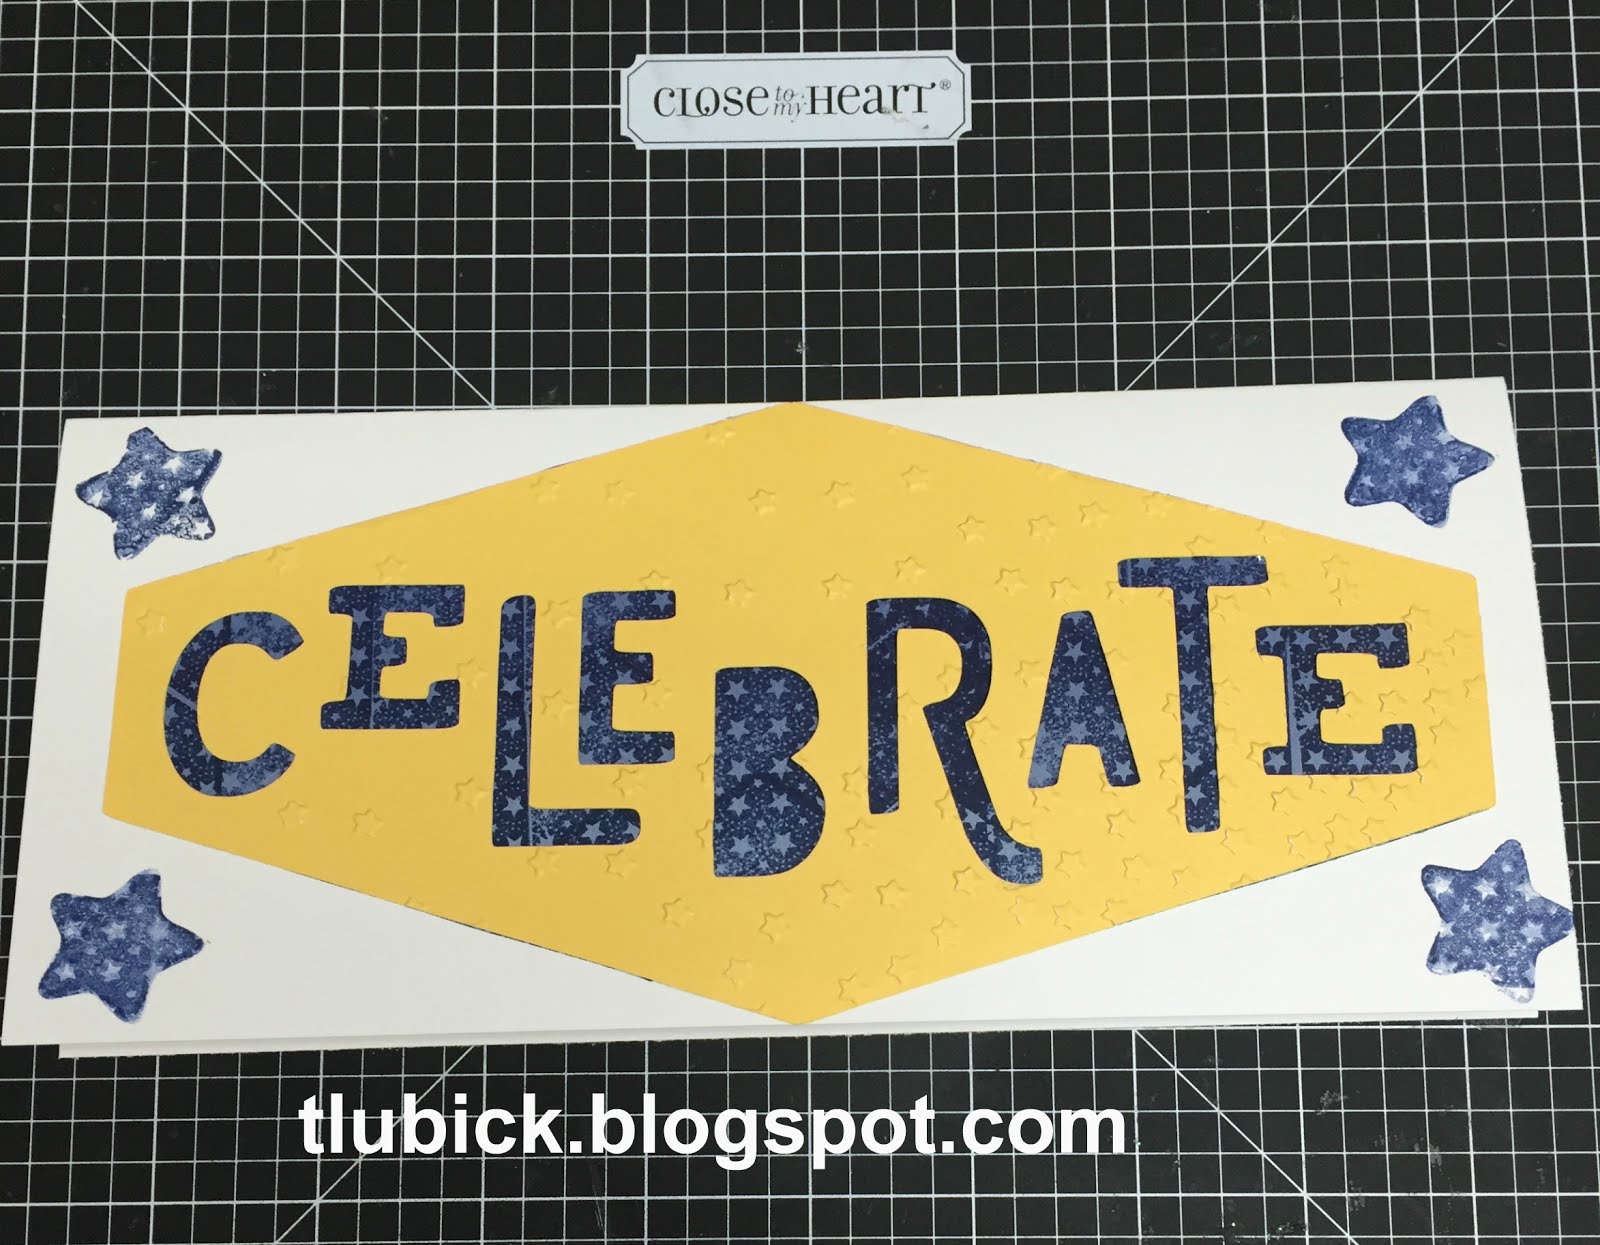
For the first card, I used the stamp to stamp kissing technique which is basically inking a pattern stamp, then using that as your "ink pad" for the plain stamp that you want to use on your creation. In this picture, you can see that I inked the banner stamp and used the back part of the star stamp to transfer the pattern to the card in a star shape. Tip to note: clean your transfer stamp each time, otherwise you end up with "muddy" transfer like you see on the right side.....I decided it was fine for this card but if you really want the white to show through, clean the stamp each time.
This is what I ended up with when I was done. I cut the Celebrate title at 4" from the Artistry Cricut cartridge using the pattern from page 19 with Canary paper then ran it through my Cuttlebug with the Confetti Stars embossing folder. The star is from the Casual Expressions stamp set while the pattern background is from a stamp set that came with the Artbooking Cricut cartridge. I cut the background paper from the Regatta B&T Duo paper then inked it with the pattern background. Ink color for this is Sapphire; I think this is such a pretty blue!
For the second card, I used the stamp to embossing folder kissing technique which is basically inking an embossing folder, then using that as your "ink pad" for the plain stamp that you want to use on your creation. In this picture, you can see that I inked the confetti stars embossing folder with Sapphire ink and used the back part of a long banner stamp to transfer the pattern to the card. Tip to note: clean your transfer stamp each time and don't worry if the pattern looks like it's still on your stamp, it won't transfer if you've cleaned it. I had used the backside of a stamp and it seems like that part retains more of the color transfer than the front side of the stamp.
Here is the second card. I inked two pieces of Regatta B&T duo paper strips cut at 2" x 5" using the kissing technique. Next I cut the star border piece at 3.5" real dial size from the Artbooking Cricut cartridge using the pattern from page 65 with Canary paper. The title is from a stamp set that came with the Artbooking Cricut cartridge using Sapphire ink. I cut two zip strips from the Regatta B&T Duo paper at 5" and layered everything on the card. Note that the photo border will hang off the edge a bit, a quick trim with the scissors will take care of that.
Thanks for stopping by, if you are ready to move along in the blog hop, Haley is next up, I am sure she has something fun to share with us as well. If you want to learn more about the techniques or supplies used, keep on scrolling down.
Technique videos:
CTMH Video - Using two stamps
Splitcoast Stampers - Using an embossing folder and a stamp
Supplies used:
Paper: White Daisy, Canary, Regatta paper pack
Ink: Sapphire
Cricut collections: Artistry, Artbooking
Embossing folder: Confetti Stars
Stamp sets:
D1604 Season of Thanks
D1525 Casual Expressions
Saturday, January 30, 2016
Blog Hop - Charlotte and Easter
Welcome to the Stampers with an Attitude blog hop. This is my first time I am participating in this particular blog, I needed to give myself more specific reasons to keep up my blog this year so I'm trying to participate in more blog hops and like the different themes to keep me challenged with trying out new techniques and different styles. If you came from Melissa Robinson's blog, you are in the right place!
I've seen a few different coffee cup card gift holders showing up on Pinterest and was inspired to try one out after I got my Cricut Aristry cartridge and noticed there is a coffee cup ready and waiting to print. For this blog hop, we are showcasing either Easter themed items or the new Charlotte paper pack. I'm sure you'll find some creative types who managed to work both themes into a single item; I decided to stick with the Charlotte paper for this project. Let's start with the final product and then I'll walk you through the set-up.
I think it turned out pretty cute and even better, it is a gift card holder as well. This is the inside (please disregard the extra line under the sentiment, I ran out of time to fix it before posting, it's been a crazy week.)
Here are the steps for making this card, it's a bit more complicated than my normal cards so I made myself some templates for the hand cut pieces and I'm sure it will go much quicker next time I decide to use this type of card.
Prep all your card base pieces using White Daisy cardstock:
For assembly and finishing:
I've seen a few different coffee cup card gift holders showing up on Pinterest and was inspired to try one out after I got my Cricut Aristry cartridge and noticed there is a coffee cup ready and waiting to print. For this blog hop, we are showcasing either Easter themed items or the new Charlotte paper pack. I'm sure you'll find some creative types who managed to work both themes into a single item; I decided to stick with the Charlotte paper for this project. Let's start with the final product and then I'll walk you through the set-up.
I think it turned out pretty cute and even better, it is a gift card holder as well. This is the inside (please disregard the extra line under the sentiment, I ran out of time to fix it before posting, it's been a crazy week.)
Here are the steps for making this card, it's a bit more complicated than my normal cards so I made myself some templates for the hand cut pieces and I'm sure it will go much quicker next time I decide to use this type of card.
Prep all your card base pieces using White Daisy cardstock:
- Artistry cartridge - page 5, cut the coffee cup at 5.5"
- Then make your card base by tracing the outline of the coffee cup on a separate piece of folded cardstock (you want a fold so you can hide the gift card inside) leave a little extra room at the top, your finished piece will be 9" by 3.25" at it's widest. Score at 1 5/8" and 6 1/8"
- Then trace the coffee cup lid using White Daisy (ink it all up with a Versamark pad and heat emboss with white powder to give it a nice finish, I promise, it really looks like an actual lid!)
- Last step is to cut another piece of White Daisy at 2" x 5" and score it at 1/2" and 4"
At this point, you'll end up with pieces that look like this:
For assembly and finishing:
- Attach the lid to the card front.
- Then use double sided tape to center and adhere the 1/2" flap of the insert piece onto the front flap of the card base, aligning the edges.
- Next use Liquid Glass along the very outside edges of the card base fold up the bottom of the card, make sure you the leave the insert free to slide up and down
- Attach the card base to the card front
- Cut a piece of Charlotte paper at 1 1/2"x 2 3/4", mount on the bottom of the card (you will have some overlap)
- Cut a piece of Desert Sand paper at 2" x 4" and emboss with the diamond embossing folder
- Adhere a 4" strip of the Charlotte B&T Duo paper to each side of the Desert Sand paper
- Attach the Desert Sand piece along the top of the Charlotte paper, trim the edges
- Cut a tag at 1 1/4" from page 36 of the Artiste Cricut Cartridge, ink Happy Birthday with Sorbet
- Include a sentiment inside; I used one from the January Stamp of the Month - Beloved Bouquet
I also found this tutorial on Splitcoast stampers with more pictures and step by step instructions (I adjusted the measurements a bit so I could use the Artistry cut as my starting point.)
Supplies used:
Charlotte paper pack
Cardstock: White Daisy and Desert Sand
Inks: Versamark and Sorbet
White embossing powder
Diamond embossing folder
Feel free to browse my website for more inspiration from Close To My Heart if you don't already have a consultant. Otherwise, I will send you off to Vickie O'Dell to see what she has created for us.
Inks: Versamark and Sorbet
White embossing powder
Diamond embossing folder
Feel free to browse my website for more inspiration from Close To My Heart if you don't already have a consultant. Otherwise, I will send you off to Vickie O'Dell to see what she has created for us.
Monday, June 8, 2015
The Happy Couple Wedding Card
A co-worker is getting married this weekend and I am the self designated card maker of the team. I took some inspiration from Pinterest posts to come up with this design using The Happy Couple stamp set, white and outdoor denim card stock/ink and embossing folders. I love the clean and elegant look. The inside sentiment says "Wishing you a lifetime of happiness" and is perfect for this occasion. The bride & groom stamp works nicely on the back of the envelope too. The hearts were cut with the Art Philosophy Cricut Cartridge at 2" and 2.25" and embossed for a bit of extra texture.
Monday, March 23, 2015
Masculine Birthday Card
I made this card for my husband's birthday this past weekend. He likes to get the homemade cards and even noticed the embossing. (Is that a sign that I spend too much time talking about the fun tools I'm working with?!)
Well, whatever the case, on to the quick instructions:
The Wanderful paper pack worked nicely for this card. I used the striped embossing folder and archival black ink to make the Happy Birthday stand out a bit more along with the stars.
Supplies used:
![]() |
| B1419 Joyful Birthday |
![]() |
| Wanderful Paper Pack |
![]() |
| White Enamel Stars |
![]() |
| Archival Black Ink |
![]() |
| Striped Embossing Folder |
Thursday, February 19, 2015
Artfully Sent - Celebrate Birthday
I mentioned how much fun I am having with the Artfully Sent Cricut cartridge already, right? I saw a post recently from a fellow consultant who used the negatives (on the left) from the original cut (on the right) and decided to borrow this idea for a couple of birthday cards using the confetti wishes paper pack. For the card on the left, I used the stripe embossing folder to give a little added dimension.
Monday, February 16, 2015
Artfully Sent - 75th birthday card
I've been playing with the Artfully Sent Cricut cartridge lately for a whole series of birthday cards. For this one, I used Heartstrings paper to make this swing card. I used a full size liner inside so I could layer in the birthday candles. It's hard to see on the picture but I embossed the white paper for the candles to give them a bit more dimension and used little bits of silver shimmer tape for the flames to add a bit of sparkle.
Wednesday, January 14, 2015
I am getting ready for a crop this weekend and put together a make and take project. The inspiration comes from this Mojo Monday sketch and the Close To My Heart January Stamp of the Month set.
For this card, I used the following supplies:
S1501 This Moment, January Stamp of the Month
Artbooking Cricut Cartridge for the bullseye
Papers: Heartstrings, Lagoon, White Daisy and Ruby
I used the Heart Embossing Folder and sanded the hearts to get the nice white contrast. The heart Washi tape works nicely with this card when layered on white paper.
Labels:
Artbooking,
Embossing Folder,
Heart,
Mojo378,
S1501,
SOTM,
This Moment
Subscribe to:
Posts (Atom)


