Showing posts with label Challenge. Show all posts

Wednesday, April 19, 2017

CTS 217 - Happy Birthday Card


For this week's CAS(e) This Sketch challenge, I turned it upside down and made a birthday card for our son.  I can't believe he's turning 25, it really doesn't feel like it! Where did the time go?  Anyway, back to the card, I used supplies from Close To My Heart:
  • Artiste Cricut Cartridge - balloon image found on page 70 cut at 1.5" from five different papers including white glitter paper for a bit of sparkle
  • I used a black marker to draw the balloon strings
  • The title was cut at 1.5" three times and layered together before mounting on the card.


CTS 217

If you'd like to learn more about Close To My Heart products, visit my website for the latest idea books and products.


Monday, April 11, 2016

Best Wishes Card - Color Dare 188

Color Dare 188
This week's Color Dare challenge is featuring the colors from the Regatta paper packet.  I made a Best Wishes card for a co-worker who is taking a new job.  The inspiration from this came from Pinterest and I adapted it using Close To My Heart products.


Instructions and Supplies Used:

  • Glacier paper cut to 7" x 10" and folded in half to make a 5" x 7" card
  • Ink around the edges with White Daisy and Glacier using stamps from the Dizzy Circles set
  • Cut a piece of White Daisy paper at 4" x 6" and mount on card front
  • Cut open squares found on the Art Philosophy Cricut Cartridge at 1.75" and .75" from Flaxen, Sapphire and Pomegranate papers, mount in random pattern 
  • Ink the Best Wishes phrase from the Springtime Wishes stamp set 
Thanks for stopping by!  


Thursday, March 31, 2016

Color Dare 186 and H2H Monogram - Anniversary Card

Heart 2 Heart Monogram Challenge


Color Dare 186


This week I am doubling up on the challenges again with this combination Color Dare and H2H Monogram Challenge Anniversary card.


I wasn't sure what I would do when the colors were posted this week but got inspired after seeing a few different posts so decided to put together an anniversary card for my cousin and his wife.  It went in the mail today; I think they will like it.

Instructions and supplies:
Artbooking Cricut Cartridge - cut the heart overlay on page 59 at 5.5" with White Daisy
Gypsy paper - cut at 5.5" x 2.75" and put the overlay on top
Top with a strip of 5.5" Blue shimmer trim
Artiste Cricut Cartridge - cut the heart on page 51 at 2.25"with Gypsy paper (layer on a piece of white, I just fussy cut that part) then cut your letter at 1" and sponge with Lagoon ink or  you could always cut it out of the Lagoon paper, whatever you have on hand!


Sunday, March 20, 2016

Coffee Lovers Spring Blog

Spring Coffee Lovers Blog Hop
 This is my first participation in this Coffee Loving Cardmaker group.  My sister-in-law has a birthday coming up so I thought I'd use this as an opportunity to showcase spring colors and a coffee related card at the same time.


This card came together pretty quickly with the use of the Artistry Cricut Cartridge and the Kaleidoscope paper packet from Close To My Heart.

Supplies used:

  • Artistry Cricut Cartridge - cut the coffee cup image on page 5 at 5" 
  • Paper: White Daisy and Kaleidoscope paper packet
  • Ink: Cotton Candy
  • Stamps:
    • D1617 Make It Merry 
    • B1438 - Banner Wishes
Note: For the title I used the masking technique to stamp "Warmest" then "Birthday" and finally "Wishes" and also used the presents from Make It Merry set with the inside sentiment.  It's fun to use stamp sets for out of season element twists.

You can purchase these supplies from my Close To My Heart website if you don't already have a consultant working with you.

I have been on a bit of a coffee run lately with different cards, you may also be interested in these posts:

Color Dare Penelope Card

Coffee Cup Gift Holder Card
Thanks a latte

Color Dare 185 - Easter Card

Color Dare 185
 This week when the color dare colors were posted I knew right away this was the inspiration for my Easter cards this year.  So, I pulled out my Artfully Sent Cricut Cartridge and cut out the card with the Easter egg on the front but couldn't just let the pieces left on the Cricut mat go to waste so I used them in a second generation card.  Then I had a problem because I couldn't decide which one to link up to the challenge so I had my husband pick and he chose the second generation card with the cotton candy background because "it has more pop" in his opinion.

First Generation
Second Generation

These were fun cards to make. Here are the instructions used for the first generation card:
  • Artfully Sent Cricut Cartridge - cut card image on page 41 at 5.5" in White Daisy
  • Artiste Cricut Cartridge - cut grass image on page 73 at .75" in Topiary
  • White Daisy - cut to 4" x 5.5" as the liner for the card front; trace the egg outline onto this sheet
  • Working from top down, fill in the egg color details:
    • Topiary scrap of paper
    • Cotton Candy ink over White shimmer trim
    • Glacier paper scrap (I used a left over piece from the Blossom paper pack)
    • Sponge 2 mini eggs with Cotton Candy; use masking technique to apply dots in Glacier ink to 2 eggs and Topiary stripes on the last egg (I used the Packages, Boxes and Tags stamp set for this part.)
    • Cotton Candy paper strip (I used a left over piece from the Lollydoodle paper pack)
    • Ink Sweet Leaf in the bottom section (I used pigment ink and heat set with clear embossing powder for a little shine.)
  • Assemble the card and use the Happy Easter title that comes with the Artfully Sent Cricut collection.

Now on to the second generation card, you end up with leftover pieces on the Cricut mat.  Apply a layer of 2 sided adhesive while they are laying on the mat. You can then lift the pieces off the mat without messing up their positioning.  Color all the pieces while they are still on the mat; trim around them in place and then trace the whole set onto White Daisy.  Transfer your pieces to the egg shape and mount on a piece of Cotton Candy paper, layer with the grass and stamp your title on a scrap of White Daisy.  I rounded the left corners to match the egg shape.

Here's some pictures to show the "mat" process:

Egg pieces left on mat
Cover with two sided adhesive


Lifted off mat and ready to color

Tuesday, March 15, 2016

Technique Blog Hop -Thin Cuts by CTMH


This week I have a "double dipper" post.  First of all, you may be coming from Michelle's blog as part of the CTMH Technique blog hop featuring Thin Cuts.  You might also be coming here to learn more details about my entry in this week's Color Dare challenge.  In any case, I am glad you found this post and hope you like this 5.5" square card I made for a fellow co-worker's promotion.


Color Dare Challenge
Here's the instructions for making this card:
  • Let's start with the Thin Cuts first, I used the Springtime Wishes set and cut out 3 flowers and 2 leaves in White Daisy (some people like stamp first and cut second; whichever way you prefer is just fine!)
    • Ink the leaves with Sweet Leaf green 
    • Ink with Sorbet pigment ink on the small flower; White Daisy pigment ink on the other two flowers then sprinkle on clear embossing powder and heat emboss them all
    • Sponge one of the white flowers with Canary ink and the other with Smoothie ink
  • Cut Canary paper at 5.5"x 11" and fold in half as your card base
  • Cut White Daisy paper at 5.25" x 5.25" and mount on the front of the card
  • Cut a piece of Smoothie paper at 5" x 4" and stamp with an image to make your own background paper (or if you happen to have some left over Hopscotch paper, that works nicely with this color challenge) then cut off .5" to mount at the bottom and mount the remainder on the top, you will have a gap showing white paper at this point.
  • Cut a strip of Canary paper at 5" x 1" and cut a scallop edge (using the scallop border punch but I don't have one so I used my trusty old scissors with a scallop edge cut) if you want to add some bling at this point, you can dot some glitter glue or pearl dots along the scallops and let those dry while you finish the rest of the card assembly.
  • Cut a strip of Kaleidoscope paper at 5" x .5" taking care to only include colors from this challenge
  • Cut Smoothie paper at 3.5" x 3.75" and mount on card front
  • Cut Flaxen paper at 3.25" x 3.5" and layer on the Smoothie pape
  • Cut White Daisy at 3" x 3.25" then sponge the edges with Smoothie ink and mount on the Flaxen paper, stamp sentiment with Smoothie ink and accent in Flaxen ink.
  • Arrange and mount flowers and leaves to finish the card.

Supplies used:
Ink: Smoothie, Canary, Flaxen, White Daisy, Sweet Leaf
Paper: White Daisy, Smoothie, Canary, Flaxen, Kaleidoscope
Stamp set and Thin cuts - Springtime Wishes

Well, that about wraps up this post, next up in the Technique Blog Hop is Judy Faye's blog for you to see what fun creation she has made us.

Thanks for stopping by!

Tuesday, March 1, 2016

Enjoy the Little Things

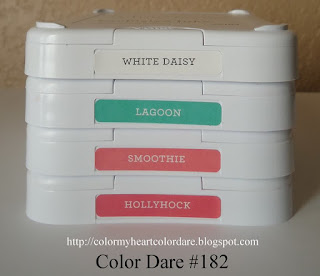
http://colormyheartcolordare.blogspot.com/2016/02/color-dare-182-smoothie-hollyhock.html
Color Dare #182
For this week's challenge, I broke out a couple of different techniques for this card.  Dry embossing on the Lagoon paper, then making my own background paper with Hollyhock ink, finished it all off with Smoothie ink for the title and a strip of some leftover paper I had from last year's Blossom paper packet (I cut out the portion of the strip that had the challenge colors this week.)  


Monday, October 12, 2015

Many thanks card


Today's challenge on Splitcoaststampers is to make a card using only words and I just had to enter this card.  I made it from a Pinterest inspiration and used it at a Close to My Heart gathering event.  Everyone liked how this turned out and it's so simple to make:

  • Load up a large block with a bunch of different words (I've also done this with Happy Birthday)
  • Stamp with ink color of your choice, here we used Pacifica on Colonial White paper
  • Mount on slightly larger piece of paper
  • Add a bit of gold shimmer trim to make it pop and mount the whole thing on a card color of your choice, desert sand in this case.
Here's a picture of the block with all the stamps on it:


This is the first challenge I entered with Splitcoaststampers and it was a fun one!  If you happen to need any stamps or supplies for  your next project and don't already have a Close to My Heart Consultant, you can shop on my website anytime.

Related Posts Plugin for WordPress, Blogger...