Showing posts with label #colordare. Show all posts

Tuesday, April 24, 2018

Color Dare 289 - Thinking of You


For this week's Color Dare challenge, I made a Thinking of You card to go along with a meal delivery for a neighbor of ours.

I used the Doily Wishes stamp set to stamp in both White Daisy and Juniper ink on my Raspberry paper.  For the Mink color needed, I used some burlap ribbon and a few sequins I had in my stash.

Thanks for stopping by, check out more entries in the challenge at the Color Dare blog.

Color Dare Blog

Wednesday, April 18, 2018

Color Dare 288 - Happy Birthday

Our son's birthday is this week so I was very happy to see the blues in the Color Dare challenge.  I got some inspiration from a few different Pinterest boards and then tweaked it a bit for this birthday card theme.


For the swirls, I selected some wreaths from the Flower Market Cricut Cartridge and used the weld feature to make them a bit more robust.  Here's the design space file if you want to recreate this yourself.  Here are the supplies I used for this card:

  • Peacock paper from Enchantment Fundamentals (Base and stripe)
  • Mink paper from Basics Fundamentals (stripe)
  • Peacock, Lagoon and Mink cardstock for the swirls
  • A few drops of Peacock re-inker on my watercolor brush for the splatter background
  • Wise Guy birthday stamp (retired)
  • Silver sequins (retired)
This was a really fun card to make and it's off in the mail to bring smiles to the recipient.  Thanks for stopping by.  You can check on the latest specials from Close To My Heart at my website.  Visit the Color Dare blog to see more fun creations made from this color palette.

Color Dare Blog

Monday, April 9, 2018

Color Dare 287 - Happy Birthday

For this week's Color Dare challenge, I made a birthday card for a friend of mine featuring the happy thin cut that's in our going soon section of the website.  


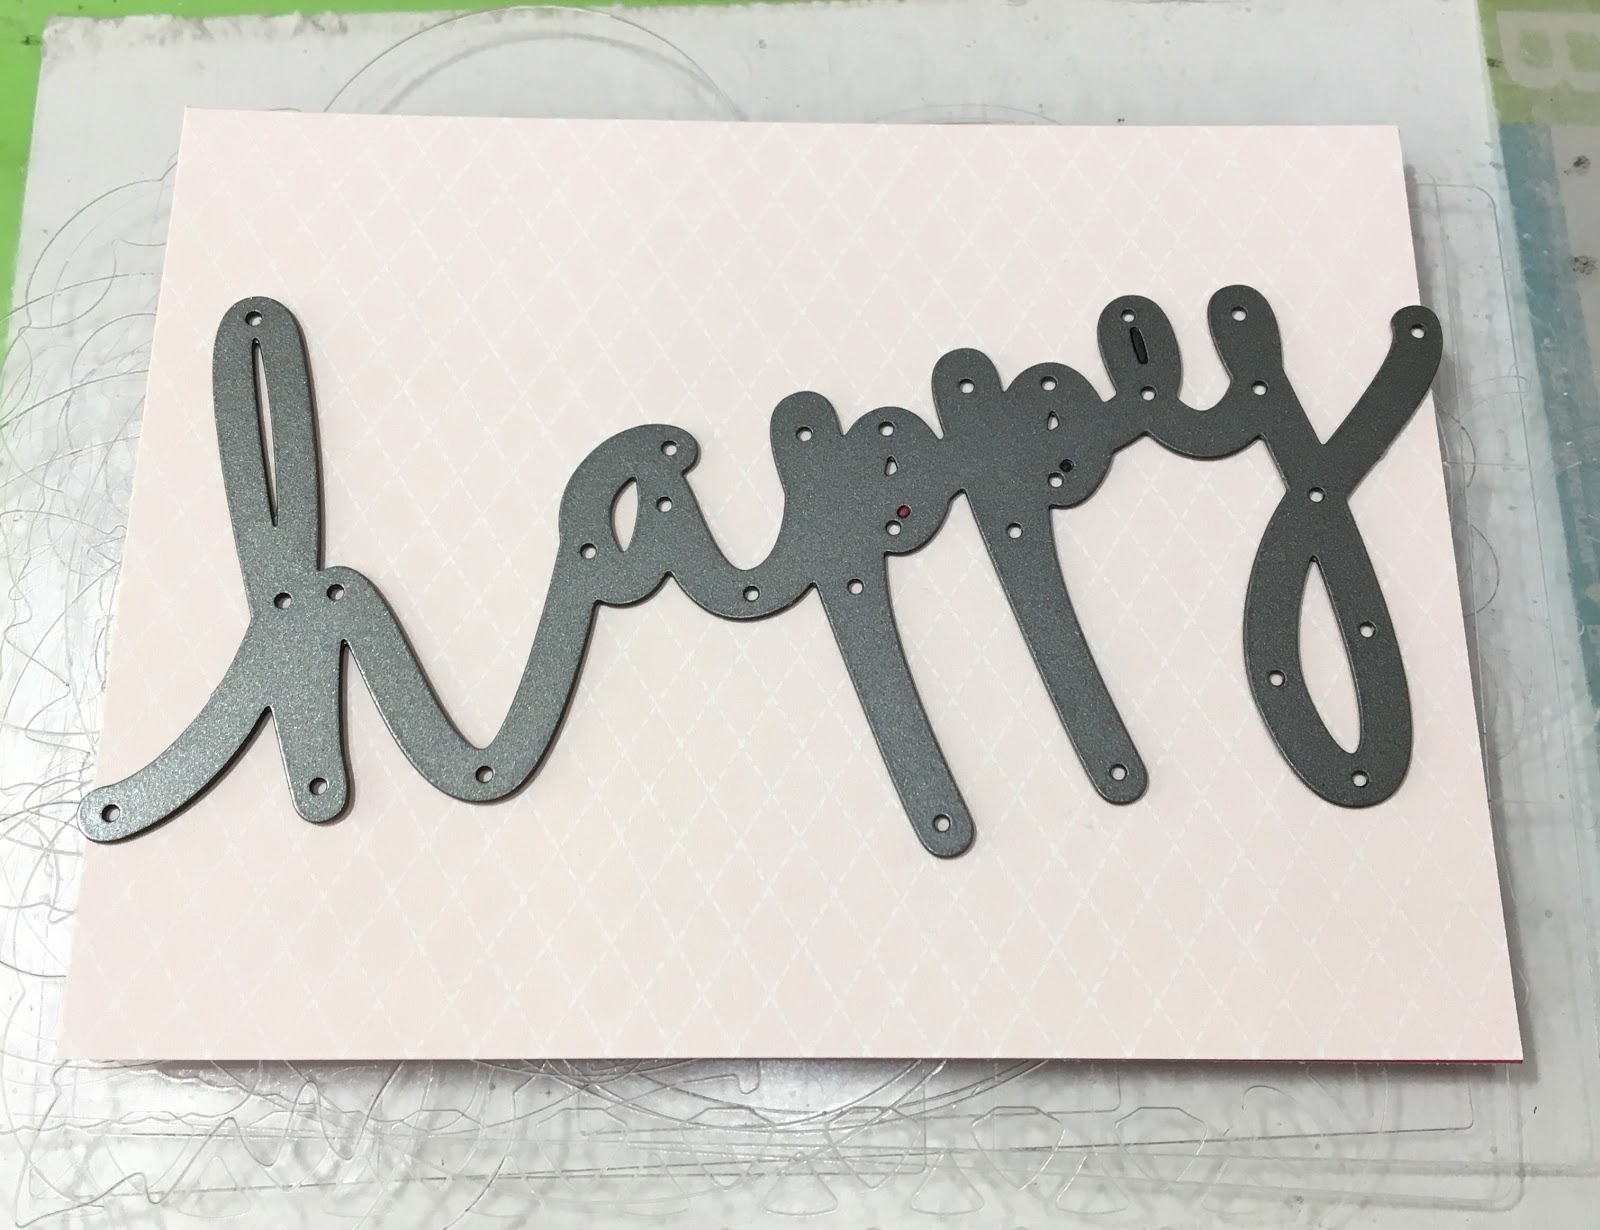
This is a fun technique for doing something a little different with  your thin cuts to get the layered look here, you'll stack two different colors of paper on top of each other and make sure that the thin cut goes just past the edge of the paper.  For this card, I used Bashful paper from the Gimme Some Sugar paper pack and Raspberry cardstock.  It looked like this before I ran it through the Cuttlebug, notice how the edges of the thin cut are just past the paper edge:


I forgot to get pictures of the cut paper after it went through the Cuttlebug.  You'll end up with a top and bottom of each color that you cut through, for my card, I mounted the top part in Raspberry on Pebble paper from Chelsea Gardens paper pack, then mounted the Bashful paper under it so I could see where the next thin cut of "happy" should go (note, you'll want to keep the little cut out pieces from the "h" and "y" so you can layer them back on in the blank spots.)

Next, stamp on the Raspberry cardstock with the small flower from the For You Darling stamp set
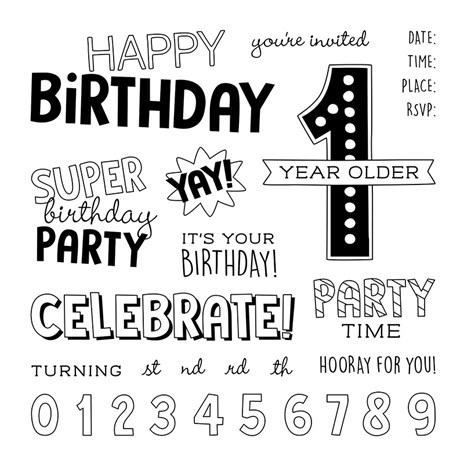
 with Raspberry ink for a tone on tone effect.  Cut out "happy" from silver glitter paper then use a masking technique for the birthday stamp in Raspberry.

I was on a roll so used white glitter paper for the 2nd card that has the Raspberry cardstock on the bottom and Bashful paper on the top. 


Then I couldn't let perfectly good negative cuts go to waste so made more cards to share as well.


Thanks for stopping by, let me know which one is your favorite.  I love how different the cards look just by changing up a few items!

Color Dare Blog

Sunday, March 18, 2018

Color Dare 284 - Happy Birthday


We have three separate birthdays to celebrate this week for my aunt, sister-in-law and husband.  I've got two cards in the mail already so was happy to see the blues posted for this week's Color Dare challenge so I could use that as inspiration for my husband's birthday card.


For this card, I used the pattern on page 53 of the Wishes book and changed up the circles to use balloons cut at 1.75", 2.25" and 2.75" from the Artiste Cricut Cartridge.  I stamped Happy Birthday from the Birthday Times stamp set with White Daisy and heat embossed it with clear embossing powder then sponged with Pacifica ink.  Then I did a quick swipe with a baby wipe across the title to remove left over ink. Since silver was optional for this challenge, I added some with a piece cut from "All About the Gold" Fundamentals  (did  you know the back of the gold is silver? makes it more versatile!)


Stamps
March SOTM - Birthday Time
Thanks for stopping by, you can check out more entries in this week's Color Dare challenge from this picture.


Tuesday, July 11, 2017

Color Dare 251 - Enjoy Your Adventure


I've been away from blogging for a bit, had a crazy work schedule and then when it got nice out, just HAD to spend more time outside.  The CTMH convention was last week and they shared tons of ideas so I figured I should get back into my blog posts and share some of the fun products we have.

For this card, I a piece of  Prickly Pear paper and cut just the stripes I needed to meet the color challenge.  Then I embossed a piece of White Daisy with the confetti embossing folder and put that next to the colored paper.  The Uptown ribbon pack has this super versatile black and gold ribbon. For a title, I used the No Worries card making stamp set.

Check out Stampaganza where you can purchase two stamp sets and get one FREE through the end of July.


Thursday, May 25, 2017

Live Beautifully - Together


May is National Scrapbooking Month and for this post, I am featuring a card made with the Live Beautifully paper packet for the special Color Dare challenge to use either the paper packet or the lovely colors featured.  I used a piece of the floral paper and the zip strip on the card base.  I don't have the coordinating stamp set so used a retired stamp that is similar and stamped on Pixie paper then layered on a piece of vellum to give it a bit more texture.  The "together" title is from the May Stamp of the Month and inked with Glacier; final touch of a few clear bitty sparkles and this anniversary card is ready to go in the mail.
Color Dare - Live Beautifully Challenge


Monday, May 22, 2017

Celebrate Card


For this week's Color Dare challenge, I made this card using some different techniques with the different colors. Start with a black and white mat from Some Kinda Wonderful paper packet. Then make a slightly smaller mat cut from White Daisy.  Use the end of a pencil and Canary ink to make a random pattern.  Then use a slightly larger circle stamp inked with Glacier. (Remember, you can use the smooth side of a stamp for this if you don't have the right size circle.) Then a little larger circle stamp using Juniper pigment ink and heat set with embossing powder.  Cut three titles from Thistle paper using the Celebrate thin cut and layer them together, really gives it a raised look.  The next photo shows that a bit better.  Finish off with a few silver sequins and this card is ready to go in the mail.


Thanks for stopping by, check out other entries in this week's Color Dare challenge.

Color Dare 244

Monday, May 1, 2017

Anniversary card with May SOTM


For this week's Color Dare challenge, I just had to break out the May Stamp of the Month called "Live, Love, Laugh" for a wedding anniversary card with these super bright and cheery colors.  I stamped LOVE with Raspberry ink and cut the letters apart then substituted a heart for the "O" and matted the letters with Lemon card stock and mounted them on the Willow patterned paper.  Next up, use a sponge dauber to ink with Raspberry, layer on the "together" stamp in White Daisy and heat set.  

You can purchase this stamp set for just $5 with a qualifying purchase on my website in the month of May or visit the Color Dare site to see more artwork for this week's challenge.

No automatic alt text available.
Color Dare 241


Tuesday, April 25, 2017

Way Awesome Card


For this week's challenge card, I combined the Color Dare colors and the CAS(e) This Sketch to make cards for a project team at work.  We are wrapping up a big initiative and I thought it would be nice to have handmade cards for each team member.

Close To My Heart supplies used with this card:

  • Paper: Some Kinda Wonderful, Pacifica, Willow and White Daisy
  • Stamp Sets: Ink Blot Flair and Beyond Awesome
  • Ink: Raspberry, Lemon, Willow, Pacifica
  • Cricut: Artistry page 50 for the title and outline shape
  • Stripes Embossing folder (set paper at an angle in the folder)
Thanks for stopping by, if you don't already have a Close To My Heart consultant, check my website for these and other fun products.

Challenge entries:

No automatic alt text available.
Color Dare 240
CTS 218

Thursday, April 20, 2017

Color Dare 239 - Thanks Card


For this week's Color Dare challenge, I made a fun Thank You card with the Flower Market Cricut Cartridge.  I haven't played with this one much so thought it would be good for this challenge.  I'm happy with how it turned out and can't wait to send it off in the mail.

Instructions:
  • Cut a 4" planter image on Uptown Fundamentals paper using the image found on page 32 of the Flower Market Cricut Manual (cut off the bottom 2" and use it on a second card), wrap the container with slate/white twine.
  • Cut flowers on page 24 from Eggplant and Canary paper at 2.25" and 1.5" (remember the keys are linked so you cut the middles at the same size as your flowers and they fit perfectly!)
  • Apply Liquid Glass to the flower middles (that way, you can stay true to the color challenge)
  • Cut "thanks" from a Thincut and White Glitter paper
Check out my website for these fun Close To My Heart products and much more.  You can also head over to see what other creations are available on the Color Dare blog site.


No automatic alt text available.
Color Dare 239


Wednesday, April 12, 2017

Color Dare 238 - Masculine Birthday


We are in prime time birthday season for my family and this week is no exception so I used this week's Color Dare challenge colors for this masculine birthday card. 

To make this card, I broke out my watercolor paints and used a splatter technique to cover the whole card with Willow and Peacock colors.  Then I did a basic wash with Willow watercolor on the left side of the card.  For the Peacock layer on the bottom, I used a sponge dauber with Peacock ink.

For the title, I stamped the "One in a Million" phrase on White Daisy and layered that on Peacock paper.  Next up was to cut a few circles out of Peacock paper and apply a few white sequins.  

Overall, I'm real happy with the results, it's fun to use different techniques on cards.  Thanks for stopping by, check out the other Color Dare entries at the link below.

No automatic alt text available.
Color Dare 238


Tuesday, April 4, 2017

Color Dare 237 - Happy Birthday


A friend of mine has a birthday coming up this weekend so I made her a card with the fun color combination in this week's Color Dare challenge.  I think it turned out super cute and can't wait to give it to her.

Instructions:
  • Cut a piece of Thistle pattern paper at 5.25" x 4" for the background.  I used a piece of retired paper from the Penelope paper packet that I had on hand.
  • Cut two pieces of White Daisy at 5" x 3.75"
  • Cut out the "happy" thin cut at an angle and outline the letters with a Thistle marker. Stamp "Birthday" on the bottom right with Lagoon ink. I used a stamp from the Birthday Sparkles occasions stamp set.
  • Sponge the 2nd piece of White Daisy with Lagoon, Tangerine & Thistle inks then apply Versamark ink over the whole sheet and sprinkle with clear embossing powder.  (See the picture below, it's hard to tell in the photo but it's really nice and shiny!)
  • Mount the layers on the card and add a few clear bitty sparkles for a bit more bling.


No automatic alt text available.
Color Dare 237


Wednesday, March 29, 2017

Color Dare 236 - Happy Birthday


A co-worker of mine has a birthday tomorrow so I used this week's ColorDare colors on his card.  I started with a 5.5" square card then mounted a 5.25" square of Emerald Fundamentals paper.  For the top layer, I cut a 5" square of White Daisy and mounted a "Happy" Thin Cut on with repositionable glue then used a cotton swab to dab on the Pacifica and Emerald ink dots.  Peel off the Thin Cut and add the rest of the title elements.  I added a black arrow for a pop of color (and to make sure I had all the colors for the challenge.)

Thanks for stopping by.

Sunday, March 12, 2017

Color Dare 234 - Pick your greens


For this week's Color Dare challenge, we get to pick any shades of green to use along with gold and white so I made this card for my mother-in-law for St. Patrick's Day.  I used the Sweet Leaf paper from the Whimsy Fundamentals pack as the background then layered on the gold stripes from the All About the Gold Fundamentals paper pack.  Next, I broke out the Flower Market Cricut Cartridge and cut out the fun cloverleaf from some New England Ivy green paper and the Lucky title that I layered on gold glitter paper.  Final accent is a green gem along with a stamped sentiment inside and I've got a card ready to go in the mail this week.

Thanks for stopping by!

No automatic alt text available.
Color Dare 234


Tuesday, February 28, 2017

Color Dare 232 - One in a Million Birthday


I used this week's Color Dare challenge to break out my new "One in a Million" stamp set to make a co-worker's birthday card.


Instructions:
  • Add about 8-10 Lemon re-inker drops and alcohol in a spray pen then spritz on a piece of White Daisy card stock cut at 3.75" x 5.5"
  • Layer on a piece of Fern fundamentals paper (this is from a retired paper pack I had on hand.) 
  • Use the solid side of the paper on the bottom; tie with a piece of sapphire and white twine before mounting to the card front.
  • Stamp title with Sapphire ink
  • Stamp an accent row with Lemon ink; the "Way to Go" stamp set has nice options
  • Add a few white enamel stars if you have them left in your stash on hand


Color Dare 232


Thursday, February 16, 2017

Fundamentals Creative Collection


Welcome to the Fundamentals Creative Collections Blog Hop where we are featuring projects made from the paper collections in the CTMH Annual Inspiration catalog. If you are coming from Corinna's blog, you are in the right place.  This is also doing double entry for this week's Color Dare challenge.


I am getting ready to teach a Baby's First Year scrapbook workshop and the Whimsy fundamentals paper collection is perfect for this project.

Supplies used:

  • 12" x 12" White Daisy paper
  • D1660 Ink Blot Flair stamp set - ink with Pixie around 3 sides of the base scrapbook page
  • Cut the banners for BABY from the Cricut Flower Market cartridge
  • C1668 Baby Bundle occasions - ink BABY banner with Whisper ink
  • 9" x 10.5" Pixie paper, ink Welcome with Pixie pigment ink and heat set
  • Attach banner letters to twist tie (I used this from my retired stash) and mount banner on Pixie paper wrapping the twist tie over the edge so it sticks down.
  • 2" x 12" strip of Whimsy fundamental paper with the Love words on it
  • 1" x 6.5" strip of White Daisy and dove tail the end so you can add journaling details
  • Stamp the stars with second generation Saffron ink and fussy cut
  • Stamp the heard with Pixie ink and mount with foam tape for a bit of dimension
  • Add photo placeholders and you've got yourself a fun layout to welcome baby!

Next up in the blog hop is Terrie, head on over to see what she's created for us or if you want to pause for some shopping and you don't already have a CTMH Consultant, check out my website at:

http://tammylubick.closetomyheart.com/

Thanks for stopping by.

Color Dare 230


Related Posts Plugin for WordPress, Blogger...