Saturday, January 30, 2016

Blog Hop - Charlotte and Easter

Welcome to the Stampers with an Attitude blog hop. This is my first time I am participating in this particular blog, I needed to give myself more specific reasons to keep up my blog this year so I'm trying to participate in more blog hops and like the different themes to keep me challenged with trying out new techniques and different styles. If you came from Melissa Robinson's blog, you are in the right place!

I've seen a few different coffee cup card gift holders showing up on Pinterest and was inspired to try one out after I got my Cricut Aristry cartridge and noticed there is a coffee cup ready and waiting to print.  For this blog hop, we are showcasing either Easter themed items or the new Charlotte paper pack.  I'm sure you'll find some creative types who managed to work both themes into a single item; I decided to stick with the Charlotte paper for this project.  Let's start with the final product and then I'll walk you through the set-up.


I think it turned out pretty cute and even better, it is a gift card holder as well.  This is the inside (please disregard the extra line under the sentiment, I ran out of time to fix it before posting, it's been a crazy week.)


Here are the steps for making this card, it's a bit more complicated than my normal cards so I made myself some templates for the hand cut pieces and I'm sure it will go much quicker next time I decide to use this type of card.

Prep all your card base pieces using White Daisy cardstock:

  • Artistry cartridge - page 5, cut the coffee cup at 5.5"
  • Then make your card base by tracing the outline of the coffee cup on a separate piece of folded cardstock (you want a fold so you can hide the gift card inside) leave a little extra room at the top, your finished piece will be 9" by 3.25" at it's widest.  Score at 1 5/8" and 6 1/8"
  • Then trace the coffee cup lid using White Daisy (ink it all up with a Versamark pad and heat emboss with white powder to give it a nice finish, I promise, it really looks like an actual lid!)
  • Last step is to cut another piece of White Daisy at 2" x 5" and score it at 1/2" and 4"
At this point, you'll end up with pieces that look like this:


For assembly and finishing:
  • Attach the lid to the card front. 
  • Then use double sided tape to center and adhere the 1/2" flap of the insert piece onto the front flap of the card base, aligning the edges. 
  • Next use Liquid Glass along the very outside edges of the card base fold up the bottom of the card, make sure you the leave the insert free to slide up and down 
  • Attach the card base to the card front
  • Cut a piece of Charlotte paper at 1 1/2"x 2 3/4", mount on the bottom of the card (you will have some overlap)
  • Cut  a piece of Desert Sand paper at 2" x 4" and emboss with the diamond embossing folder
  • Adhere a 4" strip of the Charlotte B&T Duo paper to each side of the Desert Sand paper
  • Attach the Desert Sand piece along the top of the Charlotte paper, trim the edges
  • Cut a tag at 1 1/4" from page 36 of the Artiste Cricut Cartridge, ink Happy Birthday with Sorbet
  • Include a sentiment inside; I used one from the January Stamp of the Month - Beloved Bouquet
I also found this tutorial on Splitcoast stampers with more pictures and step by step instructions (I adjusted the measurements a bit so I could use the Artistry cut as my starting point.)

Supplies used:
Charlotte paper pack
Cardstock: White Daisy and Desert Sand
Inks: Versamark and Sorbet
White embossing powder
Diamond embossing folder

Feel free to browse my website for more inspiration from Close To My Heart if you don't already have a consultant.  Otherwise, I will send you off to Vickie O'Dell to see what she has created for us.  

Wednesday, January 20, 2016

Seasonal Expressions 1 Blog Hop

Welcome to the Seasonal Expressions Blog Hop where we are showcasing products from the new Seasonal Expressions 1 catalog. If you have come here from Haley's Blog, you are on the right path! The blog hop is a great big circle, so you can start here and work your way all around.  If you get lost along the way, you’ll find the complete list of participating consultants on Melinda’s Blog.


It's winter in Wisconsin so I was very excited to get my new catalog and look at the pretty spring colors in there.  The colors used with the Penelope collection caught my eye and I just had to try out the new thin cuts for this card.  I got the inspiration for the cut-out strip technique from Maile Belles and she has a great step by step tutorial on her blog.


I stamped the large flower right on the white card front with Thistle ink, then cut out the strip.  Next, I ran the thin cuts through my Cuttlebug using White Daisy cardstock; then inked the flowers, centers and leaves.  Arrange them nicely across the card and stamp a sentiment with Peacock ink.  (Note: the Penolope featured colors use Crystal blue but I was looking for something a bit bolder for the sentiment.) Next up was to add a bit of dimension to the background so I used a flower center and Versamark ink to make a random background; I didn't want to detract from the flowers so used a clear embossing powder and heat set that.  Here's a close up picture so you can see that a bit better:


I was on a roll and decided to challenge myself to use the same color pallet for different cards; on this second card, I used an embossing folder to add another dimension for the background and then used some purple shimmer trim and a purple gem as the flower center to glitz it up a bit.


On this one, I used thicker tape so you can really see the depth of the cutout section here


For the final card in this selection, I changed from portrait to landscape and flipped my paper over, backed the title with Pixie cardstock for this completely different look


Supplies used in these projects:
C1641 Springtime Wishes stamp set
Z3201 Springtime Wishes Thin Cuts
White Daisy Cardstock
Inks: Honey, Pear, Pixie, Thistle, Peacock, Versamark
Clear embossing powder
Scallop embossing folder
Purple shimmer trim
Purple glitter gem
Strip of pear pattern paper (from either the Penelope or Kaleidoscope paper pack)


Thanks for stopping by to visit; now, head on over to Krista's Blog and see what fun project she has created for us.

Sunday, January 17, 2016

Bokeh Technique Valentine Card

I was inspired to try out the Bokeh technique once and for all after checking out the fun projects in the latest CTMH technique blog hop featuring this style. Bokeh is actually a photography term which means the blur produced in the out-of-focus parts of an image that produced by a camera lens. In cardmaking or other papercrafting area, this term is used to create a blury/hazy background.  While the background usually features dots, I just had to use hearts after seeing Helen's post that stamps work nicely if you don't want to make your own template.

Here's the final product, I will be using this as a make-n-take item at our Stamp, Scrap and Craft day coming up on January 30.


I started with White Daisy paper then used Pixie ink and a sponge dauber for the first layer (in hindsight, I would have done this after the "spritz" so I could get the lighter color to pop a bit more.)


Then, I put a few drops of Hollyhock ink in a sprayer and gave the paper a quick spritz.


Next, I used another sponge dauber and used Cranberry ink (one spot got a little darker than I wanted so that was my target for the title area!)


For the last layer, I used the smooth side of the heart that comes on with the Art Philosophy Cricut cartridge set, inked with White Daisy and then made a random pattern for the background.  Don't be afraid to overlap the hearts, it does give it a fun look.  Since the White Daisy is a pigment ink, I heat set it before mounting on the hearts (cut from Art Philosophy cartridge at 2.25" in White Daisy and 2.5" in Cranberry cardstock.)


The January Stamp of the Month was the perfect set for the title and a sentiment inside.


Here is a list of products used:
Cardstock Paper: White Daisy and Cranberry
Ink: White Daisy, Pixie, Hollyhock (re-inker), Cranberry
Cricut Cartridge: Art Philosophy
Stamp Set: S1601 - Beloved Bouquet

Thanks for stopping by!


Wednesday, January 6, 2016

Live Your Day Blog Hop

Welcome to the Live Your Day Blog Hop. We are celebrating National Papercrafting Month with the exclusive Picture My Life™ Live Your Day scrapbooking program. If you have come here from Traci's Blog, you are on the right path! The blog hop is a great big circle, so you can start here and work your way all around.  If you get lost along the way, you’ll find the complete list of participating consultants on Melinda’s Blog.


The Live Your Day collection was designed to coordinate perfectly with the sensational Everyday Life™ 2016 Planner Pages and My Crush® Everyday Life Pages, so you can seamlessly integrate pocket scrapbooking into your 2016 planner and also work very nicely on their own.  I wanted to showcase the versatility of this set with this birthday card.  


This card was fun to make and came together pretty quickly.  I used items from both of our promotions this month; the background on the top of the card is from the January Stamp of the Month - Beloved Bouquet.  I also used a sentiment from that stamp set inside the card that says "Wishing you all the happiest things in life, all the best of everything."  I thought that fit nicely with a birthday wish!  If you look closely at the Happy Birthday title, it's two tone.  For that, I inked the stamp with Pixie and then used a sponge dauber to add some spots of Sorbet to add a bit of interest.

The pattern on page 47 of the Make It From Your Heart book was the inspiration for this card layout and I used the following supplies:

Pattern card from the Live Your Day set

Paper: 
  • Sorbet
  • Pixie
  • White Daisy

Ink:  

  • Sorbet
  • Pixie
  • Bamboo
Stamp sets:
  • Joyful Birthday
  • Beloved Bouquet
Accessories/Supplies:
  • Black shimmer trim
  • Silver gems
  • Corner Rounder
You can purchase these items from your Close To My Heart consultant or can shop on my website if you don't already have one.  Now, check on Katie's Blog next to see what fun project she has to share with us. 

Tuesday, January 5, 2016

Throwback Tuesday - Valentine with Heartstrings Paper

Last night, the DeForest Scrappers met to make Valentine's Day cards for our local Meals on Wheels program and Senior Center meal participants.  For this group, we use scraps we have on hand so this was a perfect time for me to bring out some "throwback" items; the Heartstrings paper is retired now by Close to My Heart but I had a few sheets on hand for this fun 3"x3" card.


For the outside of this card, I cut the heart and overlay at 2.5" from page 69 from the Art Philosophy Cricut Cartridge.  Then I used a couple of small hearts left from the overlay I had done for the January Stamp of the Month blog hop project.

For the inside of the card, I used the white heart base as a mask and then used a sponge dauber and Pixie ink to fill in the background of the white square then inked the sentiment in Cranberry.

Check out the great selection of products currently available from Close to My Heart on my website.

Thanks for stopping by!


Friday, January 1, 2016

Beloved Bouquet - January SOTM Blog Hop

Welcome to the January 2016 Stamp of the Month Blog Hop. If you have come here from Jean's Blog, you are on the right path! The blog hop is a great big circle, so you can start here and work your way all around.  If you get lost along the way, you’ll find the complete list of participating consultants on Melinda’s Blog.


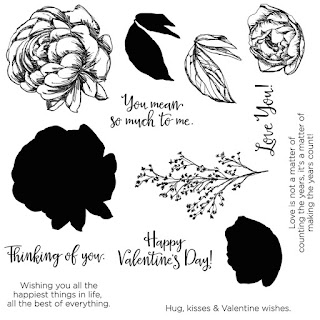
The Beloved Bouquet stamp set gave me lots of options for inspiration.  I started off with a Valentine's Day card:


 and I used one of the hearts from the negative space on this to go with the sentiment inside the card.


I think my husband will like this card!  Here's the supplies I used:

Artistry Cricut Cartridge - page 28, cut at 5.5" with cranberry cardstock from the Adventure cardstock combo then backed some of the open hearts with silver glitter paper and inked the title. I also embossed the title to give it a bit of shine to complement the glitter and glitz of the card.

Next, I made a birthday card; I just love how you can create a nice dimension with the layered flower stamps.


This one also came together pretty quickly courtesy of the Artiste Cricut Cartridge on this one. Start with a 4.25" x 5.5" piece of Hollyhock cardstock, then layer on a 4" x 5.25" piece of Charlotte paper.  Stamp the flowers on White Daisy cardstock with Pixie as the base and Hollyhock on the outline, for the third flower, I used Pixie as the outline without the base.  Ink the leaves with Sweet Leaf and fussy cut all the elements to put on the card front.  Cut the 1.34" banner from Whisper cardstock and ink the sentiment with Whisper using the stamp set that comes with the Artiste collection.  Voila, two pretty fun cards from one stamp set!

Now "Hop" on over to Pam's Blog to see her work! Be sure to visit all the Consultants at their Blogs to get some great crafting ideas and other fun ideas! The Cheers SOTM is available until November 30. Contact your CTMH Consultant or visit my website.

 S1601 - Beloved Garden
Related Posts Plugin for WordPress, Blogger...